Kubernetes Tutorials (1)
Install CoreOS with ISO
What is CoreOS Container Linux and Why
A lightweight Linux operating system designed for clustered deployments providing automation, security, and scalability for most critical applications.


So basically except some core part of the Linux distribution, like the kernel, systemd, sshd, docker, rkt those which will be pre-installed in the CoreOS container linux, the others app all will be deployed as a container , even ping.
- First Container optimized OS.
- Linux based and based on concepts from ChromeOS
- OS is Security focused.
- Auto Update OS with A/B partition
- OS is Open Source. Along with OS, CoreOS has following components:
- Systemd as Init system
- Etcd as distributed database
- Flannel for Container networking
- Docker, Rkt for Containers
- CoreOS integrates well with Kubernetes
___
Environment Preparation
Environment
Make Sure both server can access internet via ping 8.8.8.8.
    DNS:            10.10.116.202
    NTP:            10.1.37.52
    centos1 ip:     10.1.51.11/25
    coreos1 ip:     10.1.51.12/25
    GATEWAY:        10.1.51.1
| ServerName | IP ADDRESS | VCPU | MEMORY(GB) | DISK(GB) |
|---|---|---|---|---|
| CENTOS1 | 10.1.51.11 | 2 | 4 | 20 |
| COREOS1 | 10.1.51.12 | 2 | 4 | 20 |
Step by Step on install CoreOS
Reference - CoreOS Installing to disk
CENTOS1 Part
1: Install CentOS 7 on centos1 and Disable Selinux
Any CentOS 7 should work.
Note: If you don’t know how to install CentOS 7. Here is a Step by Step guild.
Disable Selinux
Login into centos01
[root@centos1 ~]#
2: Generating a pair of Public/Private SSH Access Keys
Make a new folder to save the Public/Private keys.
[root@centos1 ~]# mkdir /root/CoreOS
Using below command to generate the ssh key.
Replacing
{EmailAddress}with your own email address, e.g.,Jude.X.Zhu@newegg.com
ssh-keygen -t rsa -b 2048 -C "{EmailAddress}"
Set the passphrase to double secure the ssh access.
[root@centos1 ~]# ssh-keygen -t rsa -b 2048 -C "jude.x.zhu@newegg.com"
Generating public/private rsa key pair.
Enter file in which to save the key (/root/.ssh/id_rsa): /root/CoreOS/coreos
Enter passphrase (empty for no passphrase):
Enter same passphrase again:
Your identification has been saved in /root/CoreOS/coreos.
Your public key has been saved in /root/CoreOS/coreos.pub.
The key fingerprint is:
c4:a1:b6:0b:6e:7b:43:5e:bc:00:32:c7:20:ab:fc:06 jude.x.zhu@newegg.com
The key's randomart image is:
+--[ RSA 2048]----+
|        .        |
|. .    o .       |
| o o  o o        |
|. o +. o         |
|o  +....S        |
|.E . .o.o        |
|  o oo.o .       |
|   + .+ .        |
|  . .. .         |
+-----------------+
[root@centos1 ~]#
Confirm the public/private rsa key pair.
[root@centos1 ~]# ls -al /root/CoreOS/
total 8
drwxr-xr-x. 2 root root   38 Jun 15 08:42 .
dr-xr-x---. 3 root root  149 Jun 15 08:40 ..
-rw-------. 1 root root 1766 Jun 15 08:42 coreos
-rw-r--r--. 1 root root  403 Jun 15 08:42 coreos.pub
[root@centos1 ~]# cat /root/CoreOS/coreos.pub
ssh-rsa AAAAB3NzaC1yc2EAAAADAQABAAABAQDV/DpQ8veDFrOBCZcCzVnOJhLunhOTlYctErXZ0kXXGK42D6TOD26plQK8UTwEko/Az89KhUZEHKImJmiSfmuPbUr0LlIwL7c0z0mHmXxZXUNBz4oDraz5YplXG27YJhNgqomL1l8vFcp4KZRnnHCd47K7s3ISAnRvlKD59nEB3iLFN25iLgqE015RkzVoOOcQn+dxf535jpsWqSNj4IzLQTQP0+RAa91f25cAef3nP9nV8BQFeQsrNhVWeLqcxsugsrBdqnd4MpPooHKJ7FmA4uqn/AHXZLeRK6l+CdLXlaCeOnVYWrzRkPbW+MnpsOBQSdM7djdwpWp9cJeVAvTL jude.x.zhu@newegg.com
[root@centos1 ~]#
3: Create Cloud-init Config File
Cloud-init Config File
Cloud config init file examples
vi /root/CoreOS/cloud-config.yaml
Copy and Paste below content.
/root/CoreOS/cloud-config.yaml
#cloud-config
#
##hostname
hostname: "{CoreOS-Hostname}"

# include one or more SSH public keys
ssh_authorized_keys:
  - {Public-Key-Content}
# Network
coreos:
  units:
    - name: 00-internal.network
      runtime: true
      content: |
        [Match]
        Name={NIC-Name}

        [Network]
        DNS={DNS}
        Address={IPADDR}
        Gateway={GATEWAY}

    - name: settimezone.service
      command: start
      content: |
        [Unit]
        Description=Set the time zone

        [Service]
        ExecStart=/usr/bin/timedatectl set-timezone {TimeZone}
        RemainAfterExit=yes
        Type=oneshot
    - name: update-engine.service
      mask: true
    - name: locksmithd.service
      mask: true
write_files:
  - path: /etc/systemd/timesyncd.conf
    content: |
      [Time]
      NTP={NTP}
Replacing up variables with your own environment values.
{CoreOS-Hostname}:      Server Hostname. e.g., coreos1
{Public-Key-Content}:   The content of your public key which was generated in previous step.
{NIC-Name}:             Network Card Name. e.g., ens160
{DNS}:                  DNS IP ADDRESS. e.g, 10.10.116.202
{IPADDR}:               IP ADDRESS. e.g., 10.1.51.12/25
{TimeZone}:             TimeZone, using "timedatectl list-timezones" on CentOS 7 to list and find your own timezone value. e.g., America/Los_Angeles
{NTP}:                  NTP Server Addresses, separate with space. e.g., 10.1.37.52
Here is an example with values inside it;
/root/CoreOS/cloud-config.yaml
#cloud-config
#
##hostname
hostname: "coreos1"

# include one or more SSH public keys
ssh_authorized_keys:
  - ssh-rsa AAAAB3NzaC1yc2EAAAADAQABAAABAQDV/DpQ8veDFrOBCZcCzVnOJhLunhOTlYctErXZ0kXXGK42D6TOD26plQK8UTwEko/Az89KhUZEHKImJmiSfmuPbUr0LlIwL7c0z0mHmXxZXUNBz4oDraz5YplXG27YJhNgqomL1l8vFcp4KZRnnHCd47K7s3ISAnRvlKD59nEB3iLFN25iLgqE015RkzVoOOcQn+dxf535jpsWqSNj4IzLQTQP0+RAa91f25cAef3nP9nV8BQFeQsrNhVWeLqcxsugsrBdqnd4MpPooHKJ7FmA4uqn/AHXZLeRK6l+CdLXlaCeOnVYWrzRkPbW+MnpsOBQSdM7djdwpWp9cJeVAvTL jude.x.zhu@newegg.com
# Network
coreos:
  units:
    - name: 00-internal.network
      runtime: true
      content: |
        [Match]
        Name=ens160

        [Network]
        DNS=10.10.116.202
        Address=10.1.51.12/25
        Gateway=10.1.51.1

    - name: settimezone.service
      command: start
      content: |
        [Unit]
        Description=Set the time zone

        [Service]
        ExecStart=/usr/bin/timedatectl set-timezone America/Los_Angeles
        RemainAfterExit=yes
        Type=oneshot
    - name: update-engine.service
      mask: true
    - name: locksmithd.service
      mask: true
write_files:
  - path: /etc/systemd/timesyncd.conf
    content: |
      [Time]
      NTP=10.1.37.52
4: Start httpd service
Install and start the Apache httpd service.
yum install -y httpd

systemctl enable httpd --now
Allow httpd service port through firewall.
firewall-cmd --permanent --add-service=http
firewall-cmd --reload
Copy /root/CoreOS to httpd root folder.
cp -r /root/CoreOS /var/www/html/
Confirm
Use ‘Curl’ to check the Link
curl http://10.1.51.11/CoreOS/cloud-config.yaml
Replace
10.1.51.11with your own IP address.
COREOS1 Part
We’ve done the part of the centos1, let’s work on CoreOS installation now.
5: Download CoreOS ISO
Download the CoreOS ISO file from Here.
6: Boot coreos1 from CoreOS ISO you download
https://stable.release.core-os.net/amd64-usr/current/coreos_production_iso_image.iso
6: Set IP address, Gateway and DNS
Use ip a command to list the nic card,
Set the ip, gateway for coreos1
sudo ifconfig ens160 10.1.51.12 netmask 255.255.255.128
sudo route add default gw 10.1.51.1
Replace
10.1.51.12and10.1.51.1with your own values.
You can use ip a and ping to check the connectivity of your coreos1.e.g., ping 8.8.8.8 to check internet.
Add DNS
echo 'nameserver 8.8.8.8' | sudo tee --append /etc/resolv.conf
7: Download cloud-config.yaml
Download cloud-config.yaml to your coreos1.
wget http://10.1.51.11/CoreOS/cloud-config.yaml
ATTENSION!!!: If you change the
cloud-config.yamllater. Don’t forget copy this file to/var/www/html/to replace the old one.
Modify the variables inside the cloud-config.yaml if you need.
8: Install CoreOS to the disk
Run
sudo coreos-install -C stable -d /dev/sda -c cloud-config.yaml
After you see Success! CoreOS stable XXXX.X.X is installed on /dev/sda.
reboot the server.
9: Verify
Go back to centos1
Replacing
10.1.51.12with your own ip address.
[root@centos1 ~]#
[root@centos1 ~]# ssh -i /root/CoreOS/coreos core@10.1.51.12
The authenticity of host '10.1.51.12 (10.1.51.12)' can't be established.
ECDSA key fingerprint is b9:53:6b:c4:77:8b:e1:9f:8d:c1:fc:48:fe:1c:0e:af.
Are you sure you want to continue connecting (yes/no)? yes
Warning: Permanently added '10.1.51.12' (ECDSA) to the list of known hosts.
Enter passphrase for key '/root/CoreOS/coreos':
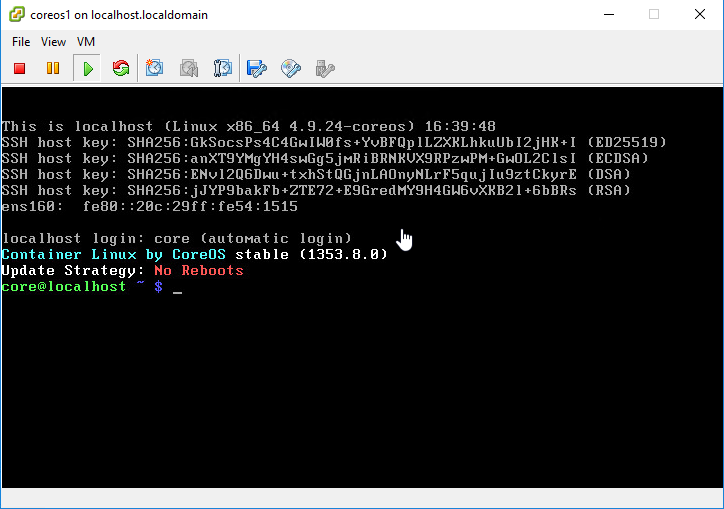
Container Linux by CoreOS stable (1353.8.0)
core@coreos1 ~ $
core@coreos1 ~ $
core@coreos1 ~ $
core@coreos1 ~ $
core@coreos1 ~ $
Done
Extra
Using bash script to generate the cloud-config.yaml
Attention: If you’re not familiar with bash script, please ignore this part.
cloud-config-generator.sh
#!/bin/sh

#define parameters which are passed in.
echo -n "Please Enter HOSTNAME and press [ENTER]: "
read HOSTNAME

echo -n "Please Enter NIC Card Name and press [ENTER]: "
read NIC

echo -n "Please Enter DNS and press [ENTER]: "
read DNS

echo -n "Please Enter IP Address/CIDR block and press [ENTER]: "
read IPADDRESS

echo -n "Please Enter GATEWAY and press [ENTER]: "
read GATEWAY

echo -n "Please Enter NTP and press [ENTER]: "
read NTP

#define the template.
cat  << EOF
#cloud-config
#
##hostname
hostname: "${HOSTNAME}"

# include one or more SSH public keys
ssh_authorized_keys:
  - ${PUB_KEY}
# Network
coreos:
  units:
    - name: 00-internal.network
      runtime: true
      content: |
        [Match]
        Name=${NIC}

        [Network]
        DNS=${DNS}
        Address=${IPADDRESS}
        Gateway=${GATEWAY}

    - name: settimezone.service
      command: start
      content: |
        [Unit]
        Description=Set the time zone

        [Service]
        ExecStart=/usr/bin/timedatectl set-timezone ${TIMEZONE}
        RemainAfterExit=yes
        Type=oneshot
    - name: update-engine.service
      mask: true
    - name: locksmithd.service
      mask: true
write_files:
  - path: /etc/systemd/timesyncd.conf
    content: |
      [Time]
      NTP=${NTP}
EOF
How to Use
Export the env variables first.
export PUB_KEY=$(cat /root/CoreOS/coreos.pub)
export TIMEZONE=$(timedatectl | gawk -F': ' ' $1 ~ /Time zone/ {print $2}'| awk '{print $1}')
Then run the scripts with inputs.
Copy the output to a yaml file.
sh cloud-config-generator.sh
or
sh cloud-config-generator.sh > cloud-config.yaml